Order Billing is an application that will be used
routinely. Regardless of which billing procedure you implement you will at
least print invoices. The two billing procedures and other related concepts
are explained below.
The user should be familiar with
all the options
and features available
from the Global
Setup chapters
as they can enhance order processing, billings, and meet specific data entry
and procedures required.
Billing, A Definition
In the context of Customer Order Processing, billing
involves the selection of line items on an order to be printed on an invoice,
the printing of the invoice and the posting of billing information to the
appropriate Accounts Receivable and Inventory Management files.
Billing Serialized Or Lot Items
If you select Bill All Items, all line items will be
selected except for the line items which have serial or lot items without a
serial or lot number entered. To select a line item that does not have a serial
or lot number, you must select Bill Certain Items and select all serial and lot
items individually. Each serial or lot item on the order must have its own
serial or lot number in order to be billed.
Two‑Step Billing Procedure
The two steps of this procedure are:
1. The customer's order is
entered as a regular order (type O).
2. Specific line items on this
order are selected to be billed on an invoice.
Note: Cash receipts may be
entered for billed orders.
There are additional steps, of course, such as
determining which items get billed and actually printing the invoice, but for
our purposes here the important distinction between the one‑step and the
two‑step billing procedures is made in the selection process.
One‑Step Billing Procedure
The single step for this procedure is:
1. The customer's order is
entered as an invoice (type I) order with all items on the order being
automatically selected.
All line items on an invoice type order are selected to
be printed on the invoice form. This method is convenient when the order is
entered after the merchandise has been delivered or when you are confident that
stocks will almost always be adequate to ship all items on the order. Like
invoice type orders, credit memos are also automatically selected during
entry. Credit memos may not be reselected or altered within the billing
application, however. If changes are required, they must be made through Order
Entry.
Selecting Regular Orders
The precise steps necessary for selecting orders are
covered later in the Run Instructions. In general, the selection process
begins with the printing of picking tickets. Only those line items whose
request dates fall on or before the request date cut‑off will appear on
the order's picking ticket. As the items for the order are picked, the stock
clerk will indicate on the picking ticket the quantity of each item that was
actually shipped. Once the order has been processed in the warehouse, the
picking ticket (or a copy of it) will be sent up to the billing department so
that an invoice can be prepared. The billing clerk will review the picking
ticket and determine if the quantity that was shipped for each item equals the
quantity that was supposed to be shipped. The clerk will then access the order
for billing and select on it those line items that appear on the picking
ticket, adjusting the quantities shipped to conform to what was actually
shipped.
After the orders have been selected, invoices may be
printed and the billing information posted to Accounts Receivable and Inventory
Management.
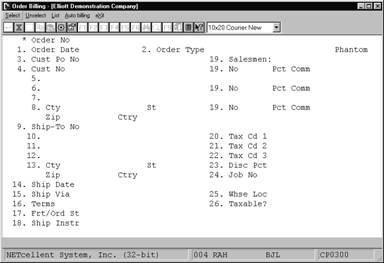
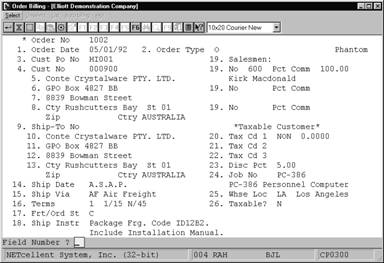
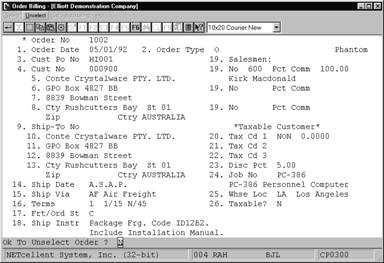
Select Order Billing from the pull down COP Processing
window. The following screen will then be displayed
The Auto-Billing menu option only applies if you have the
Shipping Verification vertical package installed, otherwise the following options are
available:
* Select the desired mode from
the Order Billing menu bar
* Orders are selected for
billing one at a time. Enter the number of the order you wish to select for
billing, or press the F1 key to display the next available unselected order.
* Once the order is selected,
changes may be made to fields on the order header as in the change mode of
Order Entry. After changing the desired fields you may select one of the
following three options regarding the billing of the individual items on the
selected order: Bill All Items, Bill Certain Items, and Bill All But Certain
Items.
* Select Bill All Items, which
automatically bills all line items on the order, which appeared on the picking
ticket.
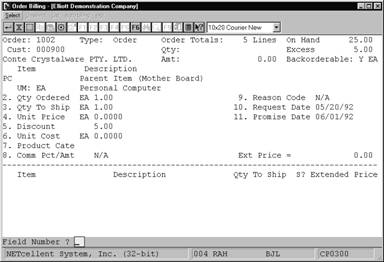
* Bill Certain Items will go
to a second screen where line items to be billed are specifically selected by
entering the item number. You may choose to scan line items on the order one
at a time by pressing the F1 key. You may also display all line items on the
order one page at a time by pressing the F6 key. Each line item that is billed
may also have its quantity to ship modified to reflect any last minute shipping
changes or back order situations.
* Items not specifically
selected for billing are not billed with the order. After the order is
processed and the invoice printed, the original order remains on file, having
line items remaining only for those items back ordered or not selected for
billing previously.
* Bill All But Certain Items
(similar to Bill Certain Items above except that items not accessed are
automatically selected for billing). Accessing an individual line item allows
the item to be billed or not and shipping quantities to be modified if billed.
If the operator answers N to Bill This Item? when the item is accessed, the
item will not be selected for billing.
* You will be asked to enter
the request date from the picking ticket. In order for this application to
know which items from the original order were actually printed on the picking
ticket it must have this date, which is printed on the top of the picking
ticket. See the Print Pick/Pack Tickets And Ship Labels application for detail
on what this date is for.
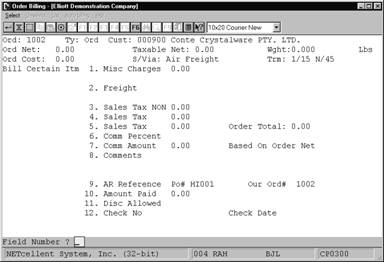
* After items have been
selected for billing, you proceed to a third screen where the final billing
information such as miscellaneous charges, freight charges, tax, commissions
and comments may be entered.
* The net amount of sales, net
taxable sales, order total cost, weight of the items selected for billing ship
via and terms display at the top of the screen.
* Miscellaneous charges are
entered and, if A/R Setup specifies that these charges are to be distributed,
the miscellaneous charges account is entered.
* Freight charges are entered
and, if A/R Setup specifies that freight should be distributed, a freight
account must be entered.
* The sales tax amounts are
calculated automatically based on the order taxable amount, order tax percent,
miscellaneous charges, and freight, and is displayed for default but may be
overridden.
* Comments may be entered,
which will print at the bottom of the invoice documents. If left blank, a
default comment may be entered during the printing of invoices, which will
print for those orders not having specialized comments entered here.
* At any time it is possible
to reselect an order for billing. Item quantities to ship modified in the
previous billing selection do not revert to their previous values. Previous
line item selections can be modified or cleared and entered from scratch
optionally.
* Orders incorrectly selected
may be unselected (that is, removed from the list of orders selected for
billing) by choosing option (U)nselect on the Order Billing menu bar. The
unselect module requests a specific order number, or allows you to pull up the
next sequential order that has been previously selected by pressing the F1 key.
It will then display the order header information and asks if you want to
unselect that order.
* (I) Invoice and (C) CR memo
type orders are automatically selected and may not be unselected.
* At any time you may print
the Billing Edit List by selecting (L)ist on the Order Billing menu bar. The
Billing Edit List will print invoices, credit memos and the billed portions of
selected orders as they will be printed as invoice forms for customer billing.
* Once billing selection is
finalized, invoices must be printed from the Print Invoices application to
complete the action of customer billing.
To return to the menu bar, press the ESC or F10 key. To
leave this application, press X for EXIT when positioned at the menu bar.
Entry Field Descriptions
Order Billing
|
Name
|
Type
and Description
|
|
* Order No
|
6 numeric digits (999999).
Enter the number of the
order you wish to select (unselect). Enter the F1 key to see the next
unselected order (or selected order).
|
|
1 ‑ 27.
|
All subsequent fields in
this screen are identical to those specified in Order Entry change mode.
If you are selecting orders:
changes to the order type, customer number, discount percent on first screen
and warehouse location are disallowed. All other fields may be changed.
|
Select Line Items
|
Name
|
Type
and Description
|
|
1. Item No
|
15 alphanumeric characters.
Enter the item number of the line item you wish to
select (or unselect if Bill All But Certain Items was chosen).
Press the F1 key to find the next line item for the
order in the same order as they are printed on the picking ticket.
You may press F2 to enter a comment in the body of the
invoice. After you press F2 you will be allowed to type comments into the
area in which the item's description would normally appear. There are two
lines of 30 characters each available for such comments on each line item.
The comments entered will print on the picking ticket if you select to have
them print.
A common use for this feature is to explain
substitutions and back orders on the previous or following line. Such comment
lines may be accessed by means of the F6 key for the purpose of
modification.
If you press the F6 key, the program will display all
line items that have been entered thus far for this order. You may then
highlight one of the line items by using the up/down arrow keys. Press the
RETURN key to display the highlighted line item. Press the F3 key to insert
a comment before the highlighted line item. Press the F7 key to
search sequentially for line items on the order. This can be especially
useful on orders with large numbers of line items.
From the line item entry
screen, press the F7 key to search for the item by number or press the F8 key
to search for the item by description.
|
|
2. Qty Ordered
|
A standard quantity format.
This field may not be
altered in this program. If a change of this field is required, use change
mode of Order Entry.
|
|
3. Qty To Ship
|
A standard quantity format.
You may change the quantity
of items to ship for this line item.
|
|
4. Unit Price
|
10 numeric digits with 4
decimal places and an optional minus sign (999,999.9999‑).
The price per item as entered in Order Entry will
display. You may change it in this application if needed.
Press the F3 key to enter a
discounted unit price for the item. You may then enter the unit price at
which you wish to sell the item. The application automatically calculates
and displays the discount percent. To accept the calculated percent, press
RETURN.
|
|
5. Discount Pct
|
5 numeric digits with 2
decimal places (999.99).
This field shows the
discount percentage applied to the full price (unit price times quantity
ordered) of this line item, as entered in Order Entry. You may change it, if
needed.
|
|
Ext Price
|
This is a display only
field. 9 numeric digits with 2 decimal places and an optional minus sign
(9,999,999.99‑).
It shows the full price
minus any discounts.
|
|
6. Unit Cost
|
10 numeric digits with 4
decimal places and an optional minus sign (999,999.9999‑).
This field is your company's own cost for one item.
You may change it if needed.
If you are using LIFO or
FIFO costing method or if the Cost To Use When Posting flag in COP Setup is
equal to actual cost, the item unit cost will be calculated when the invoice
is posted.
|
|
7. Request Date
|
A date in the standard date
format.
This is the date the
customer requested the merchandise on this line item.
|
|
8. Promise Date
|
A date in the standard date
format.
This is the date the merchandise
on this line item was promised.
|
The following entries will be requested if the item has Lot numbers:
|
Name
|
Type
and Description
|
|
Lot No
|
15 alphanumeric characters.
This is the lot number of the items being sold and/or
returned to stock. This must be a valid lot number.
Press the F7 key to search
for lot numbers.
|
|
2. Qty Ordered/Credited
|
Same as Select Line Items.
|
|
3. Qty To Ship/Ret To Inv
|
Same as Select Line Items.
|
|
4. Unit Price
|
Same as Select Line Items.
|
|
5. Discount Pct
|
Same as Select Line Items.
|
|
6. Unit Cost
|
Same as Select Line Items.
|
|
7. Request Date
|
Same as Select Line Items.
|
|
8. Promise Date
|
Same as Select Line Items.
|
The following entries will be requested if the item has
Serial numbers:
|
Name
|
Type
and Description
|
|
2. Qty Ordered/Credited
|
Same as Select Line Items.
|
|
3. Qty To Ship/Ret To Inv
|
Same as Select Line Items.
|
|
4. Unit Price
|
Same as Select Line Items.
|
|
5. Discount Pct
|
Same as Select Line Items.
|
|
6. Unit Cost
|
Same as Select Line Items.
|
|
7. Request Date
|
Same as Select Line Items.
|
|
8. Promise Date
|
Same as Select Line Items.
|
|
9. Serial No
|
15 alphanumeric characters.
This is the serial number of the item being
sold/returned‑to‑stock.
Press the F7 key to search
for serial numbers. The serial number does not have to be a valid serial
number on file. Serial numbers may be assigned to the item as it is sold.
|
Billing Information
|
Name
|
Type
and Description
|
|
Ord Net
|
This is a display only
field. (9,999,999.99‑).
It is the sum of the
extended prices of all selected items in this order.
|
|
Taxable Net
|
This is a display only
field. (9,999,999.99‑).
It is the sum of the
extended prices of all selected items in this order, which are taxable if the
customer is taxable.
|
|
Wght
|
This is a display only
field. (9,999,999.999‑).
It is the total weight of
all selected items in this order.
|
|
Ord Cost
|
This is a display only
field. (9,999,999.99‑).
It is the sum of the costs
of all selected items in this order.
|
|
S/Via
|
This is a display only
field.
This is how the order will
be shipped.
|
|
Trm
|
This is a display only
field.
This is the terms for this
order.
|
|
1. Misc Charges
|
7 numeric digits with 2
decimal places and an optional minus sign (99,999.99‑).
This is the amount of any miscellaneous charges, such
as special handling or packaging charges for which the customer is expected
to pay.
You may change this field if
needed.
|
|
Misc Acct
|
An account in the standard
account format.
If the distribute miscellaneous charges flag is set to
N in the A/R Setup, no entry will be required and the default account will be
displayed automatically. If the distribute miscellaneous charges flag is set
to Y in the A/R Setup, you will be required to enter the miscellaneous
charges account to which the charges will be posted.
The entry or automatic display will default to the
default miscellaneous charges account specified in the Ship Via Code File
Maintenance in A/R.
If profit center usage is set to O in the COP Setup,
the profit center and department (if applicable) entered on the first screen
(field #27) will try to find a valid account using the information entered on
the first screen and the main account entered in the ship via code. If no
valid match is found in the account file, this entry will default to the
miscellaneous charges account specified in Ship Via Code File Maintenance in
A/R.
Pressing the F7 key will
allow you to search the account by number or pressing F8 key will allow you
to search for an account by description.
|
|
2. Freight
|
7 numeric digits with 2
decimal places and an optional minus sign (99,999.99‑).
This is the amount of any
freight charges the customer is expected to pay.
|
|
Freight Acct
|
An account number in the
standard account number format.
If the distribute freight
charges flag is set to N in the A/R Setup, no entry will be required and the
default account will be displayed automatically. If the distribute freight
charges flag is set to Y in the A/R Setup, you will be required to enter the
freight charges account to which the charges will be posted.
|
|
Freight Acct (continued)
|
The entry or automatic
display will default to the default freight charges account specified in the
Ship Via Code File Maintenance in A/R.
If profit center usage is set to O in the COP Setup,
the profit center and department (if applicable) entered on the first screen
(field #27) will try to find a valid account using the information entered on
the first screen and the main account entered in the ship via code. If no
valid match is found in the account file, this entry will default to the
freight charges account specified in Ship Via Code File Maintenance in A/R.
Pressing the F7 key will
allow you to search the account by number or pressing F8 key will allow you
to search for an account by description.
|
|
3. Sales Tax
|
8 numeric digits with 2
decimal positions and an optional minus sign (999,999.99‑).
The program will automatically calculate the sales tax
amount based upon the order's tax percent‑1 and the value of taxable
sales. It will display this value as the default. You may accept the
default or override it.
The program will
automatically display the tax code for tax code‑1.
|
|
4. Sales Tax
|
8 numeric digits with 2
decimal positions and an optional minus sign (999,999.99‑).
The program will automatically calculate the sales tax
amount based upon the order's tax percent‑2 and the value of taxable
sales. It will display this value as the default. You may accept the
default or override it.
If the order has a tax code‑2,
the program will automatically display the tax code for tax code‑2.
|
|
5. Sales Tax
|
8 numeric digits with 2
decimal positions and an optional minus sign (999,999.99‑).
The program will automatically calculate the sales tax
amount based upon the order's tax percent‑3 and the value of taxable
sales. It will display this value as the default. You may accept the
default or override it.
If the order has a tax code‑3,
the program will automatically display the tax code for tax code‑3.
|
|
Order Total
|
This is a display only
field.
It is the order net plus the
miscellaneous charges, freight and sales tax.
|
|
6. Comm Percent
|
4 numeric digits with 2
decimal positions and an optional minus sign (99.99‑).
If the Calc Commission
Method field in COP Setup is not by item, the program will automatically
calculate the order commission percent based upon the normal commission
percents of each of the salespeople adjusted for the percent of the
commission that each is getting. You may accept this value or override it.
|
|
7. Comm Amount
|
8 numeric digits with 2
decimal positions and an optional minus sign (999,999.99‑).
If the Calc Commission Method field in COP Setup is not
by item, the program will automatically calculate the commission amount based
upon the commission percent entered above and the order's net sale amount or
the order's net margin amount. You may accept this default or override it.
If you change the commission amount the commission percent will change
accordingly.
If the Calc Commission
Method field in COP Setup is by item, the program will automatically display
the commission amount calculated during order entry for all the items on the
order.
|
|
8. Comments
|
3 fields of 35 alphanumeric
characters each.
Enter the comments that you
wish to appear on the customer's invoice or leave these fields blank to have
them be assigned default comments at the time invoices are printed.
|
|
9. AR Reference
|
30 alphanumeric characters.
Enter a brief description of the transaction or some
comments about it. What you enter in this field is entirely up to you.
The default reference consists of a brief description
of the transaction type. For example, if the transaction is an invoice type
and you press the RETURN key for the reference, the program will insert a
default of:
PO#
9999999‑99 OUR ORD# 999999
|
|
10. Amount Paid
|
9 numeric digits with 2
decimal positions (9,999,999.99).
This and the following four
fields will be entered only for invoice type orders. If the customer sent in
payment with the order you may record the cash receipt here rather than in
Accounts Receivable. Enter the amount of the payment or simply press RETURN
to skip entry of the field. If there is no payment amount entered you will
not be prompted to enter the remaining fields.
|
|
11. Disc Allowed
|
8 numeric digits with 2
decimal positions (999,999.99).
Enter the discount allowed
for the payment.
|
|
12. Check No
|
6 numeric digits (999999).
Enter the number of the
customer's check. A non-zero check number is required, so if payment was made
by some other means than a check will have to improvise a number (the date,
for instance).
|
|
13. Check Date
|
A date in the standard date
format.
Enter the check date for the invoice.
Default to the system date.
|
|
14. Csh Act
|
An Account in the standard
account format.
If there are multiple cash accounts specified in A/R
Setup you must enter here the cash account to which the payment will be
posted. The entry will default to the default cash account specified in A/R
Setup.
Pressing the F7 key will allow you to search for the
account by number or pressing the F8 key will allow you to search for the
account by description.
|
Order Billing Select
Order Billing (Select An
Item)
Order Billing (Enter Billing
Information)
Order Billing (Unselect An
Order)
REPORTS
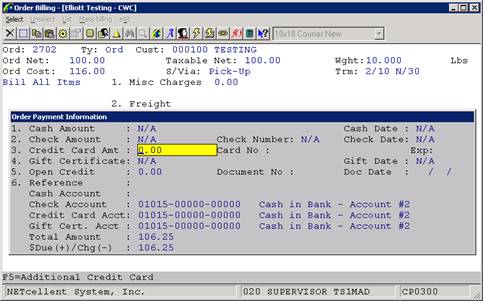
Order Billing (Payment
Information)
The payment types entered
will depend on the payment sources defined in Global Setup. Refer to the System
Manual for Global Setup information and how to set up credit card verification.
The Post Invoices To A/R application transfers all
transactions that were previously created in Order Entry into the A/R
Open Item File. In addition it sends this information to other A/R
applications such as the Customer File Maintenance, and Salesman File
Maintenance applications. This application also updates numerous files in COP
and I/M. Consequently the result of posting serves to automatically
adjust the balance that a given customer owes your business. It also affects
the cost of sales, and other related variables recorded in the customer and
salesman files. Before posting it is recommended to print the Pre-Post Edit
list to verify which orders will be updated. When you perform a posting, the
system prints a journal of all transactions that were posted to the numerous
files.
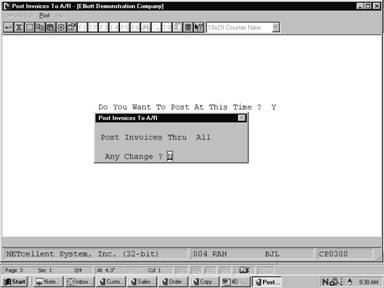
Select Post Invoices To A/R from the pull down COP
Processing window. The following screen will then be displayed:
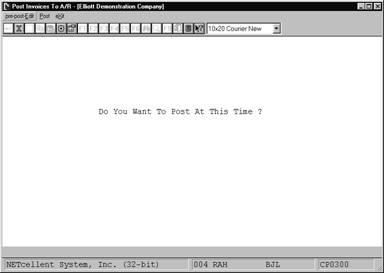
Post
Invoices To A/R Entry Screen
The
following options are available:
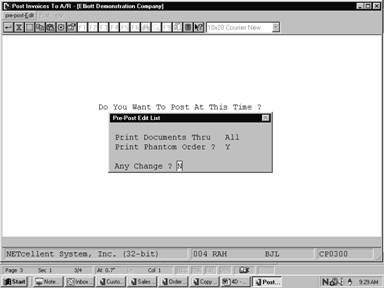
* Pre-Post Edit list
* Post
To return to the menu bar, press the ESC or F10
key. To leave this application, press X for EXIT when positioned
at the menu Bar.
Entry Field Descriptions
Pre-Post Edit List
|
Name
|
Type
and Description
|
|
Print Documents Thru
|
A date in the standard date
format 99/99/99.
Enter the final date that
you want to print.
|
Post
|
Name
|
Type
and Description
|
|
Do You Want To Post At This Time ?
|
Y or N.
Enter Y to post or N
to decline.
|
|
Post Invoices Thru
|
A date in the standard date
format 99/99/99.
This process runs
automatically.
|
Pre-Post Edit List
Post Invoices To A/R
The Purge Posted Invoices application removes
previously posted Order Entry transactions. It ensures that the Order
Entry transaction file will not become excessively large over a period
of time. This purge will affect the amount of information that is available
for the Order Inquiry and Available To Promise applications in
the Inquiry pull down window. Also, this application allows you to
purge quote type orders.
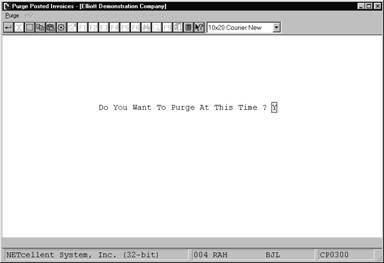
Select Purge Posted Orders from the pull down COP
Processing window. The following screen will then be displayed:
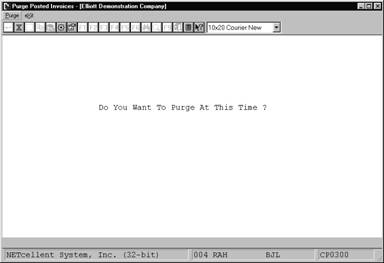
Purge Posted Orders Entry Screen
The
following option is available:
* Purge
·
This
application runs automatically, and returns to the menu bar when the purge
process is complete.
To
return to the menu bar, press the ESC or F10 key. To leave this
application, press X for EXIT when positioned at the menu bar.
Entry Field Descriptions
|
Name
|
Type
and Description
|
|
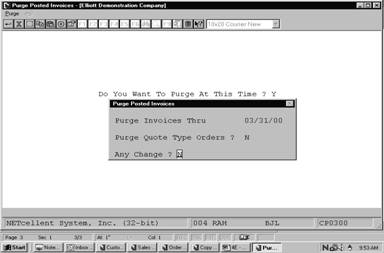
Do You Want To Purge At This Time ?
|
Y or N.
Default is N.
|
|
Purge Posted Orders Thru
|
Standard date format.
|
|
Purge Quote Type Orders ?
|
Y or N.
Default is N.
|
Purge Posted Orders (Screen
#1)
Purge Posted Orders (Screen
# 2)
